
In this post we will install the web client and replace the SSL certificates with trusted ones, by using the VMware certificate tool. Installation and SSL certificate replacement is straight forward. There is one installation gotcha that I elaborate on below. Getting IE 10 on Windows Server 2012 can be a bit frustrating to get working with the web client, so I’ll go over that as well.
Blog Series
SQL 2012 AlwaysOn Failover Cluster for vCenter
vSphere 5.5 Install Pt. 1: Introduction
vSphere 5.5 Install Pt. 2: SSO 5.5 Reborn
vSphere 5.5 Install Pt. 3: vCenter Upgrade Best Practices and Tips
vSphere 5.5 Install Pt. 4: ESXi 5.5 Upgrade Best Practices and Tips
vSphere 5.5 Install Pt. 5: SSL Deep Dive
vSphere 5.5 Install Pt. 6: SSL Certificate Template
vSphere 5.5 Install Pt. 7: Install SSO
vSphere 5.5 Install Pt. 8: Online SSL Minting
vSphere 5.5 Install Pt. 9: Offline SSL Minting
vSphere 5.5 Install Pt. 10: Update SSO Certificate
vSphere 5.5 Install Pt. 11: Install Web Client
vSphere 5.5 Install Pt. 12: Configure SSO
vSphere 5.5 Install Pt. 13: Install Inventory Service
vSphere 5.5 Install Pt. 14: Create Databases
vSphere 5.5 Install Pt. 15: Install vCenter
vSphere 5.5 Install Pt. 16: vCenter SSL
vSphere 5.5 Install Pt. 17: Install VUM
vSphere 5.5 Install Pt. 18: VUM SSL
vSphere 5.5 Install Pt. 19: ESXi SSL Certificate
Permalink to this series: vexpert.me/Derek55
Permalink to the Toolkit script: vexpert.me/toolkit55
Install Web Client
1. Mount your vCenter 5.5 ISO and launch the installer. On the installer screen select vSphere Web Client then click Install.
2. Accept the license agreement then we see the Destination Folder. Now you may be thinking, like I did, ok let’s install this on the D drive. Bzzzttt that would be bad. There’s a long standing issue (since 5.1) with the web client that it will only function on the C drive. So I would urge you not to change the path if you want a functional system.
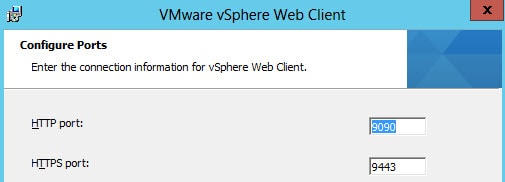
3. Accept the default ports.
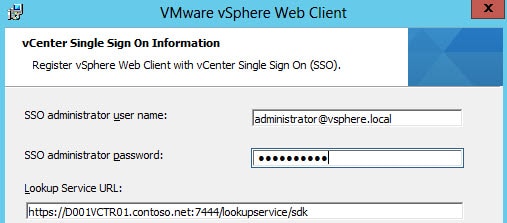
4. Enter the SSO password that you entered during the SSO configuration. Verify that the lookup service URL is correct.
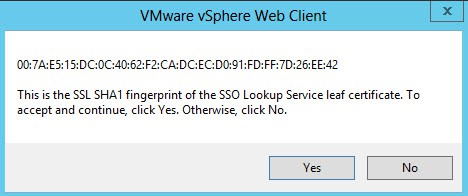
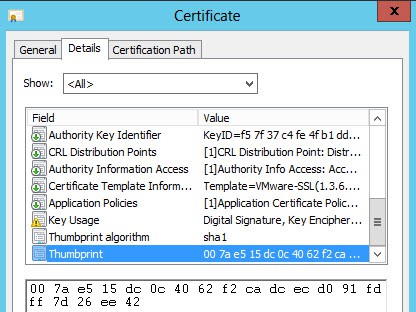
5. The web client should now pop up with a hash value of the lookup service certificate. If you have already replaced your SSO certificate, as covered in Part 10, then we can verify the web client is using the trusted SSO certificate. Double click on the rui.crt file in your vCenter SSO and go to the Details tab. Scroll all the way down and verify the hashes match. As you can see here, they are match.
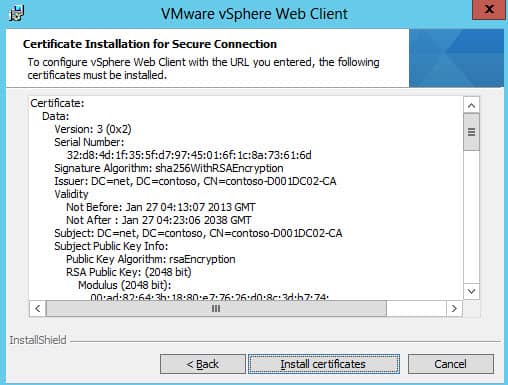
6. Another window should pop up that lists some certificates. In my case three certificates were listed: Root, intermediate, and the SSO service. All were issued from my trusted CA, so I clicked Install Certificates.
7. The installer was then ready to install so I clicked Install. Wait a few minutes after the installer is done so the web services can start up.
Replace SSL Certificates
1. Launch the VMware SSL automation tool. From the main menu select option 7.
2. On the next menu first select option 4, and after that completes, select option 6. Each time you will be asked to confirm details such as the certificate path, username and password. All values should be pre-configured for you. You should see two successful messages.
Configure IE 10
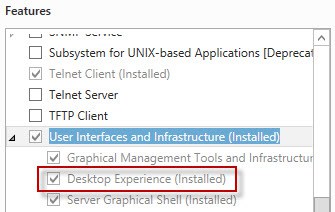
Using IE on Windows Server 2012 requires a bit of reconfiguration to enable it to work with the web client. Unfortunately the web client is Flash based (terrible idea, should use HTML5), and Microsoft built flash player into Windows 8/WS2012 (also a terrible idea IMHO). If you skipped over my vCenter VM provisioning section, you must have the Desktop Experience enabled for Flash to work. If that feature is not enabled (and subsequently fully patched by Windows update/WSUS/SCCM), Flash will be non-functional or outdated. The web client is very picky about what version of Flash is installed.
1. If IE Enhanced Security is on, turn it off.
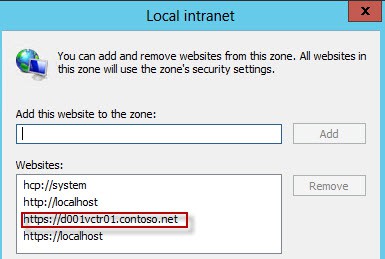
2. Open IE and navigate to the URL for the web client: https://YourFQDN:9443/vsphere-client. The web page will likely come up blank white page. This is because IE is blocking Flash player. Add the URL to the Local Intranet zone. Refresh the web page and the login box should appear. If it does not appear, or you get a Flash Player error/icon, then you haven’t run Windows update recently on the computer. Fully patch the server before proceeding. You can’t be sneaky and download the offline Flash Player. It’s baked into Windows now, so it must be updated through Windows Update/WSUS/SCCM.
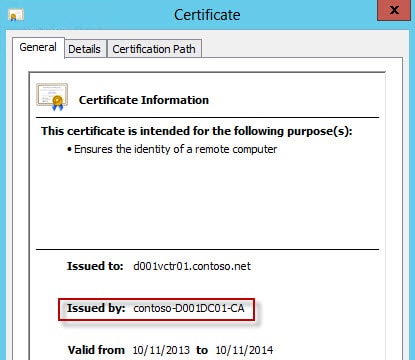
The URL should not appear red, since the SSL certificate has been replaced. You can also click on the lock icon to view the SSL certificate being used and that it is trusted.
3. In the lower left of the web page click on Download the Client Integration Plug-in. Save it and then run it. You will need to close IE for the installer to proceed. Open IE after the installer is complete and go to the vSphere client page again.
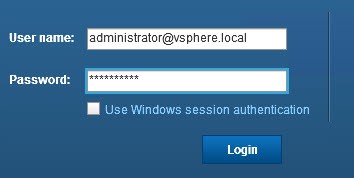
4. You should now see a login box and the Use Windows Session Credentials box is now un-ghosted. We can’t use that feature yet, but now you know the client integration pack is installed. Login with your ad***********@*****re.local password.
5. If everything goes well then you should now see the very fast vSphere Web Client open up. Congrats, you have a working vSphere web client with a trusted SSL certificate.
Summary
As you can see, installing the web client, configuring SSL, and fiddling with IE10 is not rocket science. You are now able to connect to the SSO service and poke around with some settings. That’s exactly what we will do in Part 12.








I've got an odd problem here. I've followed the guide to a T. I'm trying to install the Web Client. At the screen where you supply the SSO user,pass and lookup service URL, the installation tells me "Could not connect to vCenter Single Sign On. Make sure that the Lookup Service URL points correctly to the vCenter Single Sign On instance you installed. If vCenter Single Sign On is installed with an IP address, make sure the IP address is specified in the URL" .. Well, I know SSO is running. I verified by going to https://vcenter.fqdn:7444/lookupservice/sdk I also verified… Read more »
I’m having the exact same issue after following this guide to a T. Soon as i try to install the webclient, it tells me it cannot connect…troubleshooted everything and I’m still stumped.
resolution for error "registration with sso / lookup service failed" is :
1 Install all component default
2 Replace certificate afrer installation
if you get error "Client is not authenticated to VMware Inventory Service "
try this solutin https://communities.vmware.com/message/2301904
Great article!! Many thanx. 🙂
Question: In my template, i changed the validity period to 10 years instead of 2. But certs are still only valid 2 years?
Couldn't get it to work in IE so I'm using google chrome.