Now that we have the Windows PSC installed, it is time to prepare for installing vCenter. vCenter can support three database types: embedded vPostGres (supports up to 20 hosts and 2000 VMs), Microsoft SQL, and Oracle. SQL seems to be the most popular choice, so that’s what I’ll help you configure here. Now to be frank, nothing has really changed here in vSphere 6.0 for the SQL setup. But it does fully support SQL 2014, which is great. Note: VUM 6.0 does not seem to support SQL 2014. So check VMware docs to verify compatibility when you go to install. To find out if your particular SQL version is supported, you can check out the VMware Product Interoperability Matrixes. Be sure to select “Solution/Database interoperability” so you can view the supported Oracle and SQL databases. Double check VUM!
Do take note that VMware fully supports “legacy” SQL failover clusters for the vCenter database. This is distinctly different from AlwayOn Availability Groups, which are currently NOT supported. Nag your VMware TAM about AlwaysOn Availability Group support. I wrote an entire blog series about setting up a SQL 2012 failover cluster, which you can check out here. It’s nearly the same steps for SQL 2014.
Blog Series
vSphere 6.0 Install Pt. 1: Introduction
vSphere 6.0 Install Pt. 2: Platform Services Controller
vSphere 6.0 Install Pt. 3: Certificate Management
vSphere 6.0 Install Pt. 4: vCenter Upgrade Best Practices
vSphere 6.0 Install Pt. 5: ESXi Upgrade Best Practices
vSphere 6.0 Install Pt. 6: Install Windows PSC
vSphere 6.0 Install Pt. 7: Config SQL DBs
vSphere 6.0 Install Pt. 8: Toolkit Configuration
vSphere 6.0 Install Pt. 9: SSL Templates
vSphere 6.0 Install Pt. 10: Install VCSA PSC
vSphere 6.0 Install Pt. 11: VMCA as Subordinate
vSphere 6.0 Install Pt. 12: PSC Machine Certificate
vSphere 6.0 Install Pt. 13: Directory Services Certificate
vSphere 6.0 Install Pt. 14: Windows vCenter Install
Permalink to this series: vexpert.me/Derek60
Permalink to my Toolkit script: vexpert.me/toolkit60
Create DB Files
VMware unfortunately does not provide a tool to automatically create your SQL database for you. So it’s up to you to size and configure the SQL databases prior to installing vCenter. You must also configure the proper DSN, and install the appropriate SQL client. Since VMware left these tasks up to the customer to do, I’ve included them in my vCenter toolkit to help expedite your installation process.
My vCenter toolkit script was very popular for 5.5 users, so I’ve updated the script for 6.0. Some of the SSL work isn’t quite done, so I’ll be releasing future updates to complete the SSL setup. But the current version does support the SQL DB creation, so let’s get to work.
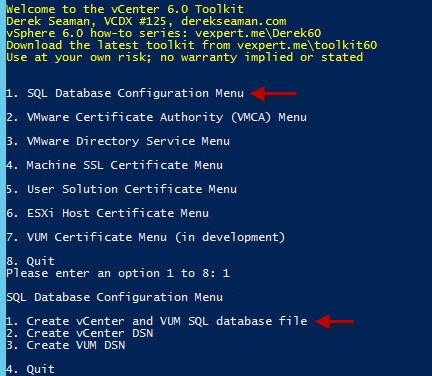
1. Go to this permalink (here) and download my PowerShell script. To create the SQL databases you can run the script from anywhere. But for simplicity I’d suggest running it on what will be your vCenter server. Run the script, and you should see a menu similar to the screenshot below. Menus may change a little between releases.
2. On the main menu select Option 1 to open the SQL Database menu. Select the option to create the vCenter and VUM SQL database file (Option 1). You will then be prompted for a series of responses, to properly size the database and log files for both vCenter and VUM. The screenshot below shows all of the prompts, and example configuration.
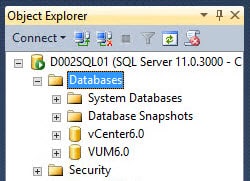
3. After the configuration file is written, copy it over to your SQL server and open it in SQL Studio. Modify the paths to the files as needed, then run the script. You should not have an errors, and two databases should now appear on your SQL server.
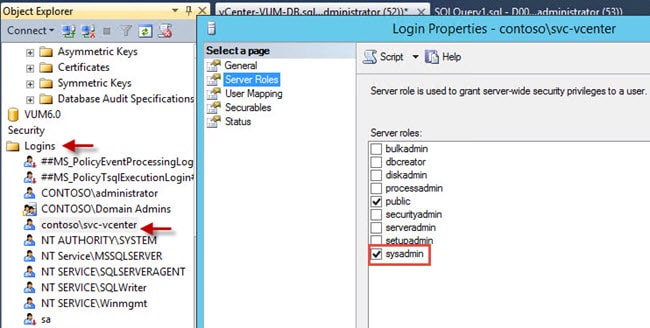
4. During my vCenter testing I found that even though the service account was DBO on the two databases, the vCenter installer complained. So for installation purposes, I gave the service account temp ‘sysadmin’ permissions at the SQL level, as shown below.
4. Back on the vCenter server run the Toolkit script again but this time we need to create the vCenter DSN. Select that option from the menu, option 2 in the version shown. Enter the required information, then download and install the SQL client as indicated.
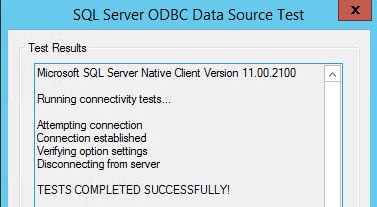
5. Just to make sure the DSN will work, launch “odbcad32.exe”, click on System DSN, then find your vCenter DSN. Click on Configure, click Next through the whole wizard, then click on Test Data Source. Verify success.
6. If you are going to use VUM, then we need to repeat a similar process to create the DSN and test the connector. Using my Toolkit script, select option 3. Follow the prompts to create the DSN, then from the Windows start screen search for “data” and select the ODBC Data Sources (32-bit) option. Perform a DSN test and verify success. Again, verify with VMware which SQL version VUM 6.0 supports. VUM has not been updated in ages, and may NOT support SQL 2014.
Summary
We’ve now created both the vCenter and VUM databases in SQL, configured the ODBC connectors, and verified they work. The final step in getting vCenter up and running is actually installing vCenter using the databases we just created. But before we install vCenter, let’s configure my vCenter toolkit script and download our root CA public certificates, here in Part 8.


It is worth noting that VUM 6.0 (very annoyingly) does not support SQL 2014 (VUM 5.5 does!). I hope this changes soon