As a quick recap of this series we are installing VMware Horizon View 5.2 for a small pilot of a Windows 8 VDI desktop. In Part 1 we installed the Connection Server, in Part 2 we configured an SSL certificate, and in Part 3 we performed some basic Connection Server configuration.
In this installment we really get our hands dirty, and get to the fun stuff. First, we will provision a new Windows 8 VM, then properly configure AD, and finally create a pool for our Windows 8 VM.
For this exercise I would suggest using Windows 8 x64, Enterprise edition. I’m only preparing one VM in this demo, but feel free to create a larger pool.
Additional articles in this series:
VMware Horizon View 5.2 Part 1: Basic Installation
VMware Horizon View 5.2 Part 2: SSL Certificate
VMware Horizon View 5.2 Part 3: Initial Config
Prepare Win8 VM for Horizon View 5.2
1. In vCenter provision a new Windows 8 x64 (or x86) VM using hardware version 9. I would do a minimum of 3GB of RAM and a 30GB C drive. Mount the Windows 8 ISO, and do a regular installation.
2. Install VMware tools, then configure the network properties, do Windows update, and join to your domain.
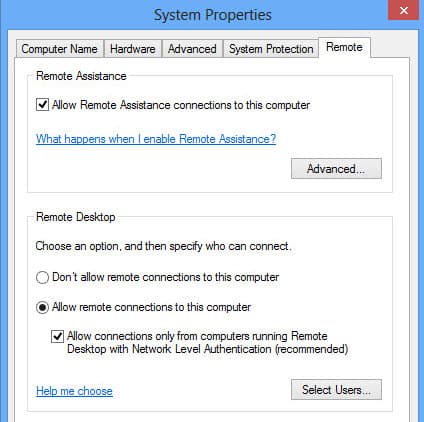
3. By default Windows 8 has aggressive power settings, and the VM will suspend after a while. I recommend using the High Performance power profile. I would also enable remote desktop access as well.
4. As part of your Horizon View 5.2 downloads you should have downloaded the agent installer. Copy the appropriate agent (x86 or x64) to the VM and start the installer.
5. If you are asked to reboot the VM, do so. Re-run the installer and select all defaults and wait for the install to complete.
Configure Active Directory
1. Create a new OU for your VDI computers. We will need to apply a GPO to them, so a new OU makes life easier. I called the OU Windows 8 VDI.
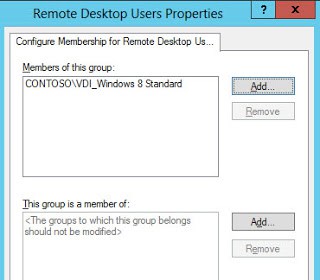
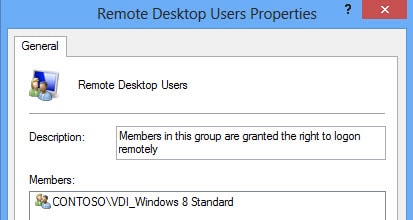
2. Create a domain security group that users will go into that are authorized to get a desktop from the pool that we will define later on. I called my group VDI_Windows 8 Standard. Add a couple of test users to this group.
3. We need to modify the Remote Desktop Users group to allow the group we just created access. You can do this any number of ways, but let’s create a new GPO for this purpose. Link the GPO to the VDI OU you created.
4. Open the GPO and navigate to Computer ConfigurationPoliciesWindows SettingsSecurity SettingsRestricted Groups.
5. Right click on Restricted Groups and add the group Remote Desktop Users. Now add the group you created and added to users to back in step 2. Be sure to add this group under Members of this group in the upper half of the window.
Creating a Desktop Pool
1. Launch the Horizon View Administrator and in the left pane under Inventory select Pools. Click Add Pool.
2. For this mini-pilot effort we will do a Manual Pool using Dedicated with automatic assignment.
3. Choose vCenter virtual machines.
4. You should now see your vCenter server listed.
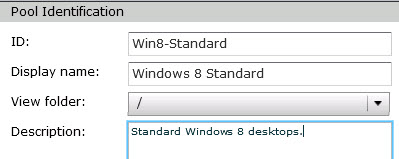
5. On the Pool ID screen you need to configure the ID, Display Name, Folder and an optional description. The ID has limitations on what characters you can use (e.g. no spaces) and the box will be outlined in red if you violate the rules.
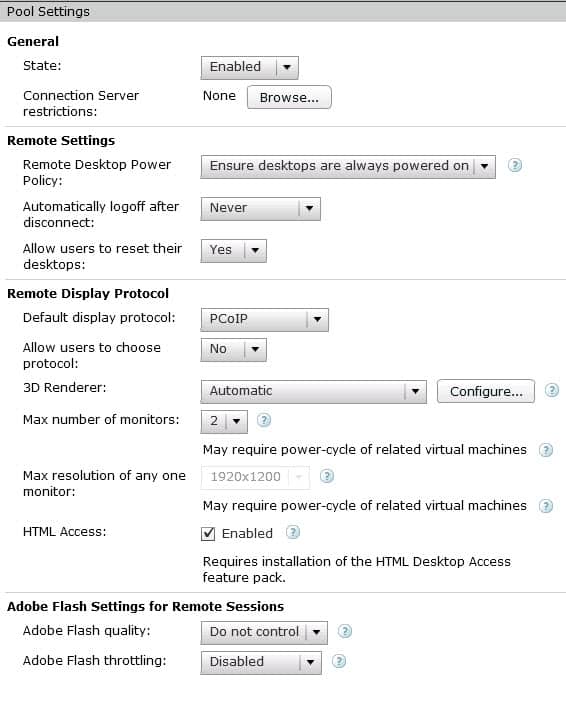
6. The pool settings are highly dependent on your environment, so feel free to tweak them as needed. I changed a few settings to those shown below.
7. Locate the Windows 8 VM(s) that you have provisioned and add them to the pool.
8. If your infrastructure meets the requirements, the wizard will now allow you to choose to use the storage accelerator. If you aren’t using a third-party storage appliance like Atlantis Computing ILIO then I would enable the feature.
9. On the Ready to Complete screen review all of your choices. At the top of the window mark the Entitle users after this wizard finishes.
10. When the Entitle window pops up add your entitlement group (e.g. VDI_Windows 8 Standard).
11. Reboot your Windows 8 VMs, and wait a few minutes. In the View Administrator click on Desktops and you should see your desktop(s) listed. Wait (a while) for the status to change to Available. It could be very slow to change from the Startup status so be patient.
Stay tuned for upcoming installments in the Horizon View 5.2 series, coming to a blog near you.





Again, really great series. I have followed your 15 part VMware 5.1 install series, now this. Really great work and youre a skilled instructor. Cant wait for more View stuff 🙂
You are a genius – many thanks man!
Brilliant blogs, really helped me get a VM View system working for evaluation quickly!
I look forward to the next installment!
I’m patiently awaiting VMware Horizon View 5.2 Install Part 5 😉
That may be coming….probably wait for a vSphere 5.5 certified version then finish up that series.