As mentioned in my vSphere 6.0 installation series, you can configure the new VMCA to be a subordinate to your enterprise CA. This is great, and opens up new certificate management options for organizations that wish to use trusted SSL certificates. However, you may run into a situation where this new root certificate is not published into active directory and thus your Windows computers will not trust it. This short post will show you how to publish the VMCA signing certificate to AD, which then gets pushed down to the domain computers.
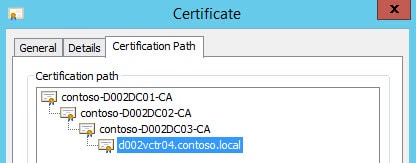
You can see if you have this problem by going to your PSC/VMCA and double clicking on the C:\Certs\VMCA\root_signing_cert.crt and clicking on the Certificate Path tab. If there’s just one entry with a yellow warning, your VMCA is not trusted by that Windows computer. Note: This assumes you are using my Toolkit to create your VMCA certificates. That path is not native to the VMware installation. To correct this condition follow the procedure below.
1. On a domain controller launch the GPO management tool.
2. Find the appropriate group policy you wish to manage. In my simple lab I’m modifying the default domain policy.
3. Open Computer Configuration\Policies\Windows Settings\Security Settings\Public Key Policies\Trusted Publishers.
4. From your PSC/VMCA, go to C:\Certs\VMCA and copy the root_signing_cert.crt file to your domain controller.
5. Right click on Trusted Publishers and select Import. Run through the wizard and import your signing certificate.
6. On your PSC/VMCA open a command prompt and type “gpupdate /force” and wait a minute.
7. Double click on C:\Certs\VMCA\root_signing_cert.crt and you should now see the full certificate chain under the Certificate Path tab.
Where is the Certificate?
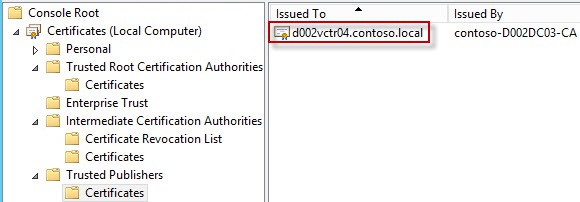
If you are curious where the certificate got published, then open a blank MMC and add the certificates snap-in. Manage the computer account, then go down to Trusted Publishers. Open the Certificates folder and you should see the name of your PSC.


