If you are using Ruckus Unleashed as your Wi-Fi controller of choice, but want to migrate to Ruckus One, this post is for you. If you want to find out all about Ruckus One and the benefits it has over Ruckus Unleashed, check out my article Enterprise Grade Home Wi-Fi: Ruckus Unleashed vs. Ruckus One. This post is short and too the point. It will walk you through converting your environment from Ruckus Unleashed to Ruckus One.
Pre-Stage Your Configuration
One great feature about using a cloud based controller, like Ruckus One, is that you can pre-configure almost everything before you add the first access point. There’s currently no direct Unleashed to Ruckus One migration path, except for manually configuring Ruckus One to reflect your Unleashed settings. Maybe Ruckus will add an Unleased backup import feature like they do with ZoneDirector.
Before you upgrade the firmware on your APs for Ruckus one I would strongly suggest going into Ruckus One and doing as much Venue, AP, and Wireless network configuration as you can. I will be publishing a full Ruckus One Best Practices Guide for Premium Home Wi-Fi in the not too distant future. I’ll update this post with a link when that is live. Until then, it’s up to you to set everything up.
Download Solo Access Point Firmware
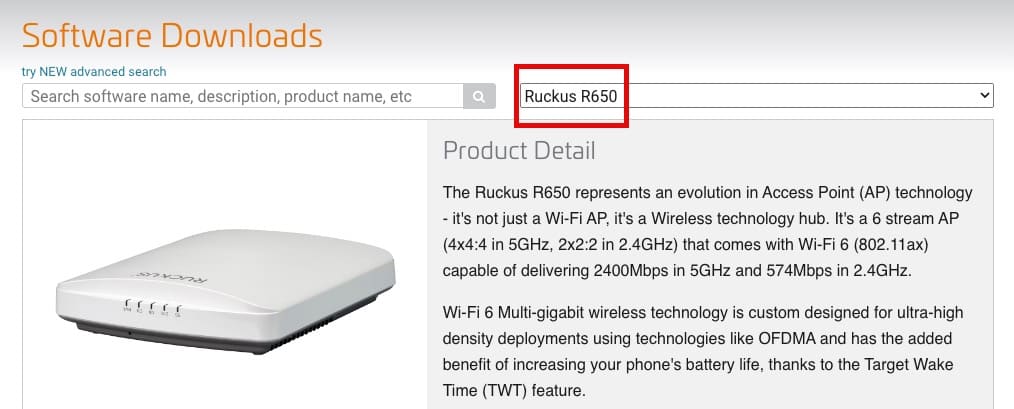
- Go to Ruckus Software Downloads and locate your AP model in the search bar.
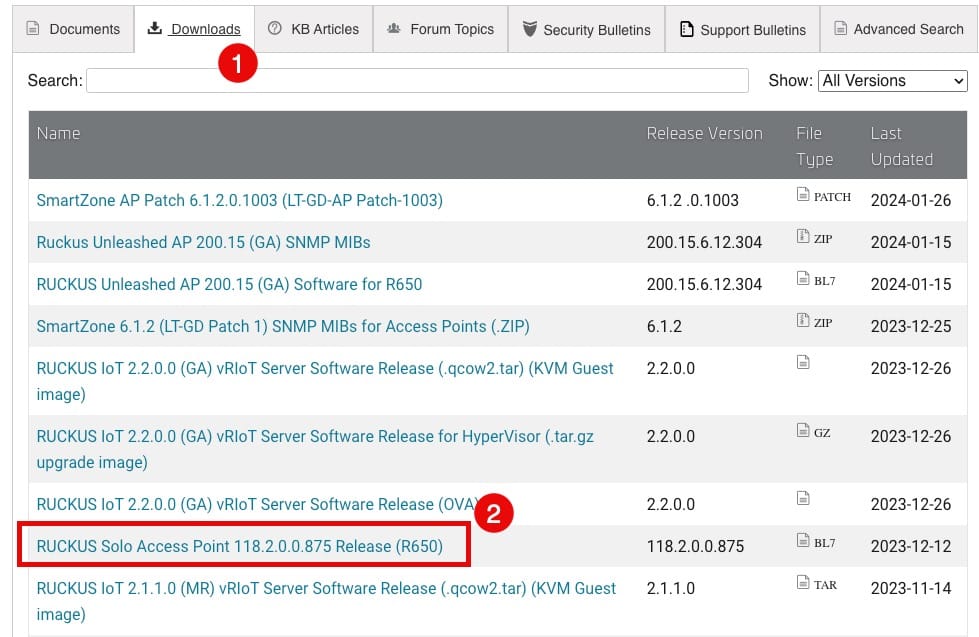
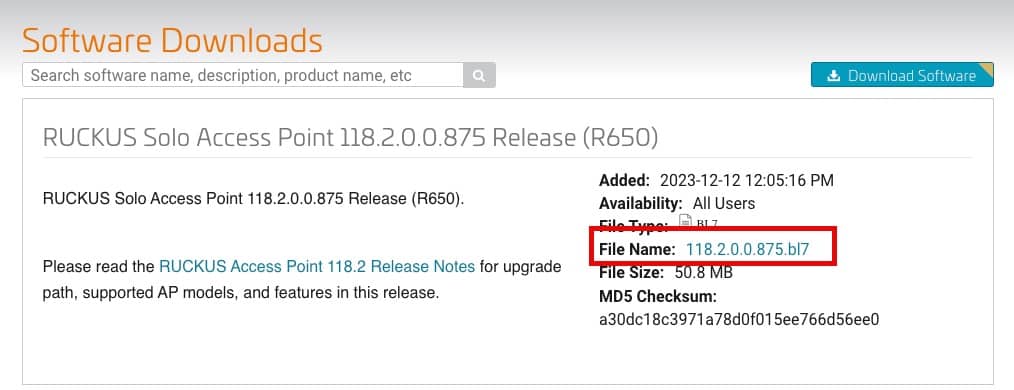
2. Click on Downloads, then look for the latest RUCKUS Solo Access Point firmware update. Do NOT download IoT, SmartZone, or any other packages. It MUST be Solo Access Point. Click on the Solo Access Point link. Make sure it’s the latest version available for your AP.
3. In the upper right pane click on the File Name link to download the firmware bundle.
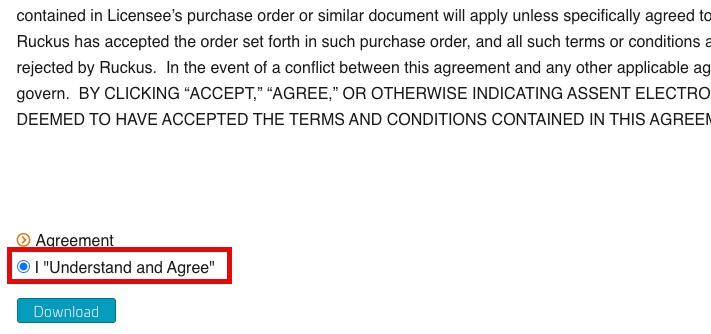
4. Read the EULA in detail, then a few hours later, click on I Understand and Agree. Click Download.
Flash Solo Access Point Firmware
- Power down ALL of your Unleashed APs. Yes, ALL.
- Perform a factory reset of the first AP you want to migrate to Ruckus One.
- Wait a few minutes for the AP to reboot and perform the reset.
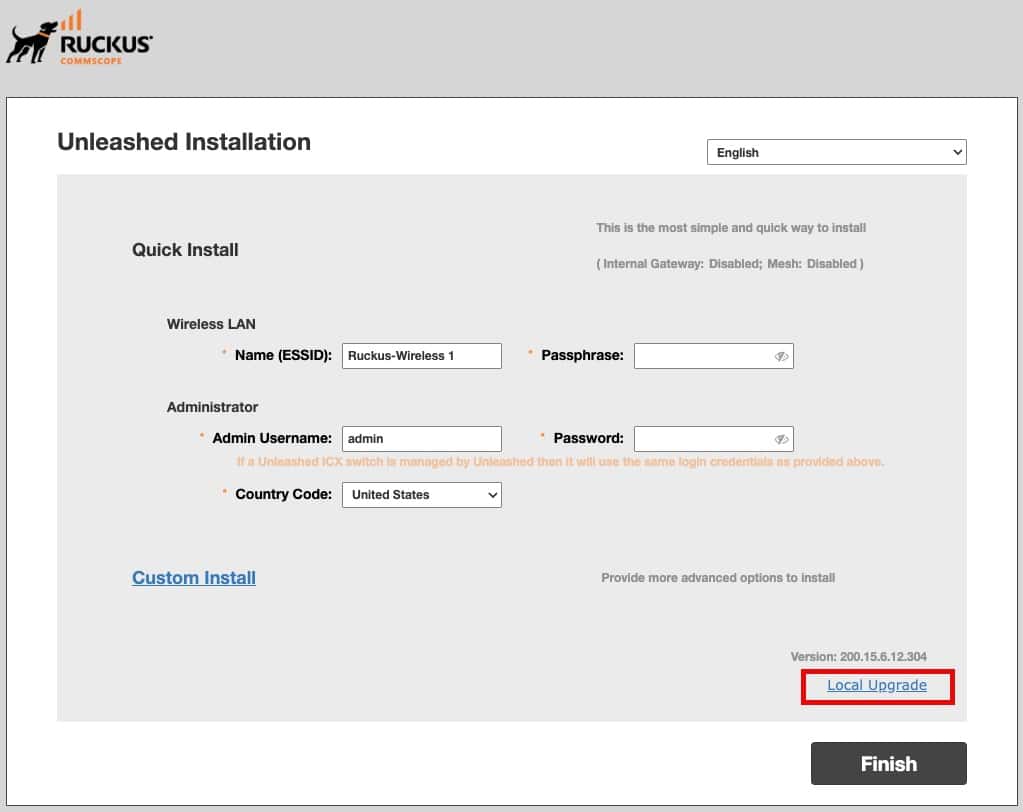
- Open a browser to the IP of the AP. You should see the Unleashed Installation screen.
- In the lower right click on Local Upgrade.
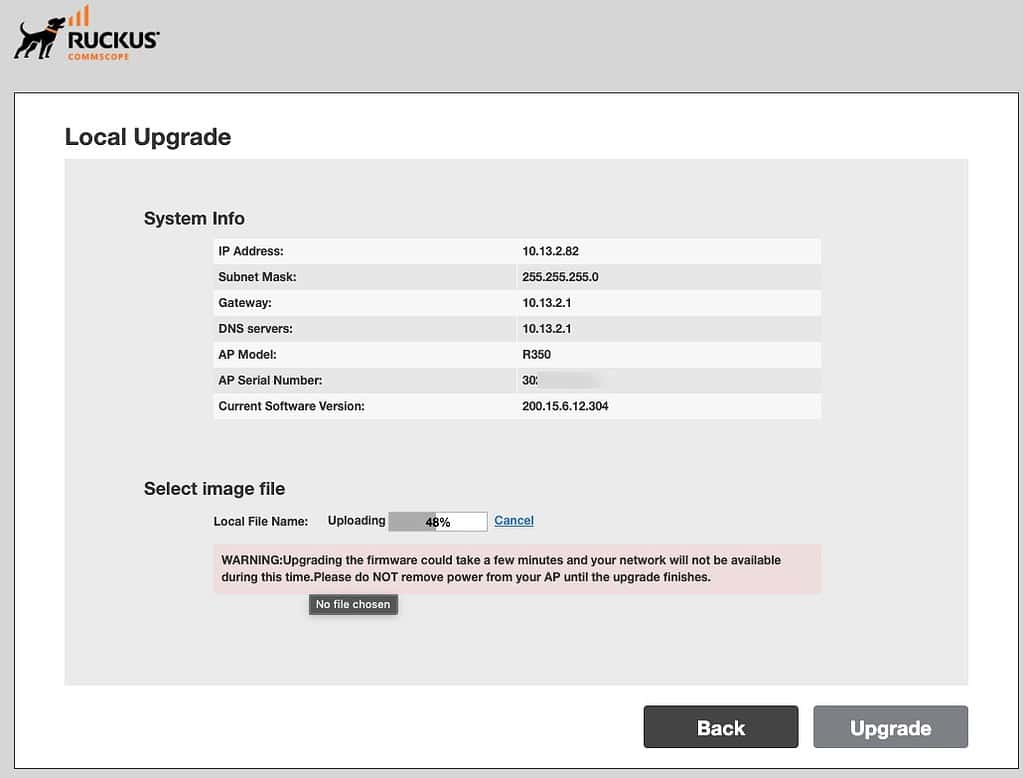
6. Click on Choose File and locate your Solo Access Point firmware bundle. Wait on the upload to complete.
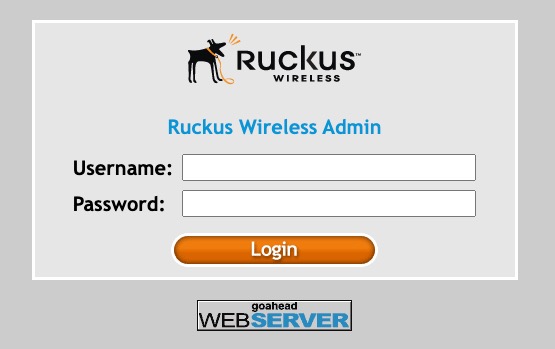
7. Click Yes on the upgrade screen. Wait several minutes for the upgrade to complete. Once the upgrade is complete you should see the following login screen.
8. Repeat the same firmware flashing process on all of your other APs. While the other APs are flashing, you can proceed to the next section and provision your first AP in Ruckus One.
Provision the AP in Ruckus One
1. Open a fresh InPrivate/Incognito window or a window from a different browser engine than you used to flash the firmware.
2. Login using username super and password sp-admin. If those credentials don’t appear to work, you might have skipped step #1 about using an InPrivate window or different browser engine. Maybe some stale cookie was causing authentication to fail?
3. When prompted, enter a disposable password. Login again with username super and the disposable password you entered.
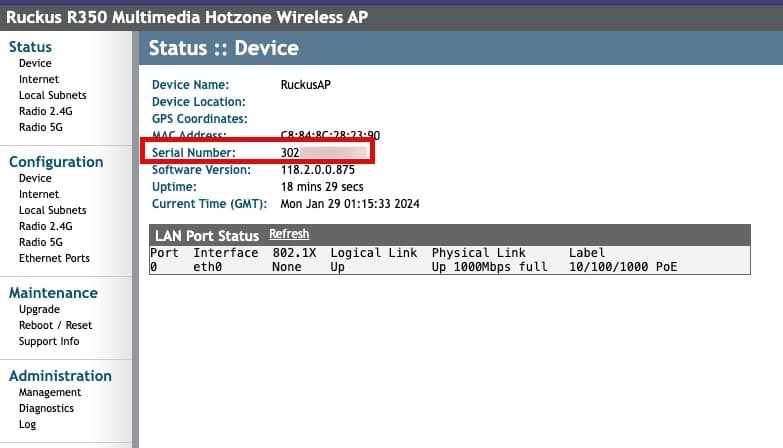
4. Locate the serial number of your AP and copy it down.
5. Login to your Ruckus One account. In the left pane click on Wi-Fi, then AP List.
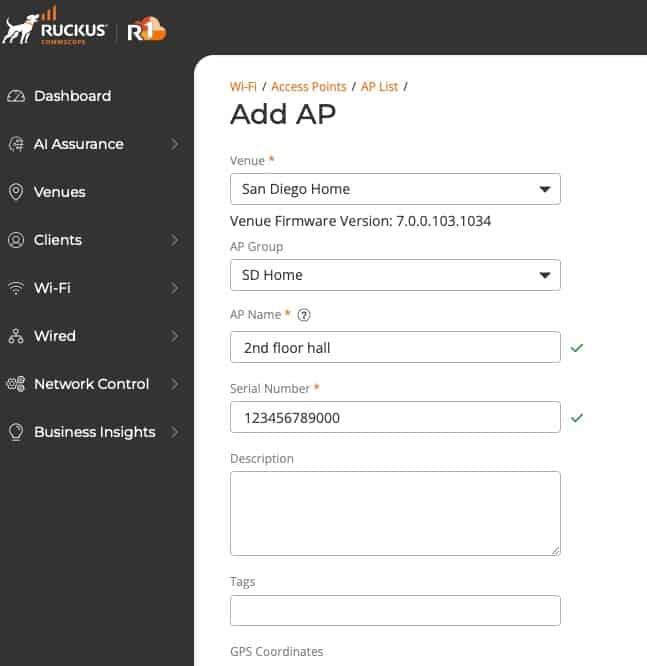
6. In the upper right click on Add. Click on AP.
7. Fill in all of the details for your AP. Click Add.
8. Power cycle your AP and wait about 15-20 minutes. When you power cycle the AP it will automatically connect to Ruckus One, pull down the latest Ruckus One firmware, then reboot.
9. After it has been fully provisioned in Ruckus One you should see the status change to Operational.
10. Congratulations! Your Unleashed AP is now provisioned in Ruckus One with new firmware. You can now fully utilize Ruckus One to manage your AP. If you have any more APs that need to be provisioned in Ruckus One, add the rest of the serial numbers now and reboot the APs.
Purchasing Ruckus One
Ruckus has an extensive partner network which sells their APs, network switches, and controller licenses. Prices can and do vary wildly between partners. Doing a Google search for a particular AP model or Ruckus One license SKU will probably return prices far higher than if you worked directly with a human at a Ruckus partner.
I purchased my Ruckus gear through the authorized partner JRC Technologies. Joshua, the owner, is extremely responsive to inquiries at all hours of the day, and weekend. He happily works with both residential and business customers. He can hook you up with any Ruckus products, including APs and Ruckus One subscriptions. Since he’s an authorized Ruckus partner, any purchases will be registered with Ruckus in your name for the limited lifetime hardware warranty. Be sure to tell him Derek sent you for the best possible deal.
Note: Only Ruckus authorized partners can register your purchase with Ruckus for the limited lifetime warranty. Purchases made through Amazon, Ebay (even if new), or other non-authorized partners means you get NO hardware warranty. If you want the warranty, always verify you are using an authorized partner. A lot of resellers are NOT. JRC Technologies, my preferred partner, is authorized.
Summary
Cross-flashing a Ruckus Unleashed AP with firmware which is compatible with Ruckus One is very straight forward and easy to do. This is a fully supported procedure, and doesn’t require any sketchy hacks. Once the AP has been flashed with the Solo Access Point firmware, it will automatically connect to Ruckus One. If the AP’s serial number has been assigned in Ruckus One, the AP will download the Ruckus One firmware and be ready for use in just a few minutes. Congratulations you are now using Ruckus One!
