Nutanix is a great platform for running a range of workloads from small, medium, to large. As disk capacity requirements increase, it can be beneficial to back large data disks (e.g. 1TB+) with multiple smaller virtual disks (vDisks). Although not set in stone, using 4-6 virtual disks instead of one huge disk can significantly boost disk performance with these large data sets. Typically we see this most applicable to database-type workloads, where there is a large working set size and where there can be a lot of write activity. Multiple disks provides more ability to queue I/O requests, additional OPLOG space, and better distrubute high I/O within the Nutanix distributed fabric.
If you review many of our best practice guides, such as those for SQL, Exchange, Oracle, etc. you will see this multi-disk layout explicitly called out. This principle applies to other workloads as well that have a large capacity footprint. Sometimes applications, such as SQL, have built-in tools for sharding data across multiple virtual disks. However, there are some applications that want a single large logical chunk of capacity, such as an E drive, and don't know how to shard data across multiple disks.
In cases where you have an application that is not multi-drive 'aware', you have a couple of options in Windows land on how to present multiple vDisks to the application in a single namespace. First, there's the two decades old method of using dynamic disks and various types of volumes within Windows. This worked OK years ago, but Microsoft recognized the limits of their old method. In addition, through extensive Nutanix testing, using 'legacy' dynamic disks can turn sequential I/O into more or less random I/O by the time it hits the Nutanix front-end. This, clearly, is not optimal. So the bottom line is do NOT use dynamic disks in a Nutanix environment if you want maximum performance.
Fortunately, Microsoft has a newer technology called Storage Spaces. Although designed more for JBOD storage, it has a useful purpose in the virtual world with Nutanix. Here, we can take multiple virtual disks presented by the hypervisor to the guest OS, stripe the data across them, and logically present the capacity as a single drive letter or mount point to the application. Storage spaces are the modern version of dynamic disks, and yes, aren't just for baremetal use cases.
The remainder of this blog post will walk you through the very simple process of creating a single storage pool, virtual disk, and volume via Windows Storage spaces. I'm using Windows Server 2019, but this technology is in prior versions of the OS and the process is the same.
On the architecture side of things, you may need to configure multiple pools. Why? Let's say you have a home grown application that needs two 5TB disks. I would recommend creating two pools/virtual disks/volumes, each striped across 4-6 disks. That allows you to independently configure and manage the two entities separately.
Do take note that Storage Spaces reserves some capacity for it's internal use. So if you present 4x 100GB disks to storage spaces, the resulting usable volume size will be less than 400GB. Take that into account so you provision sufficient capacity up front.
Finally, in a VMware environment a best practice is to distribute multiple VMDKs across several PVSCSI controllers. For example, if you have 8 VMDKs you want to present to your application, I would add two PVSCSI controllers to the VM and 'hang' 4 disks off each controller. You can have a maximum of 4 SCSI controllers per VMware VM. I commonly see 1 LSI SAS for the boot disks, and 1-3 PVSCSI controllers depending on the amount of disks presented to the OS.
Multiple SCSI cards is not a consideration with Nutanix AHV, as we handle vDisks in an entirely different and automated method. Just provision the needed vDisks with AHV and AOS takes care of the rest.
Configuring Windows Storage Spaces
1. Provision all the new virtual disks to your VM, using your favorite hypervisor tool. If you are using VMware, use the PVSCSI controller for the new disks. For Nutanix AHV, use the default SCSI disk type.
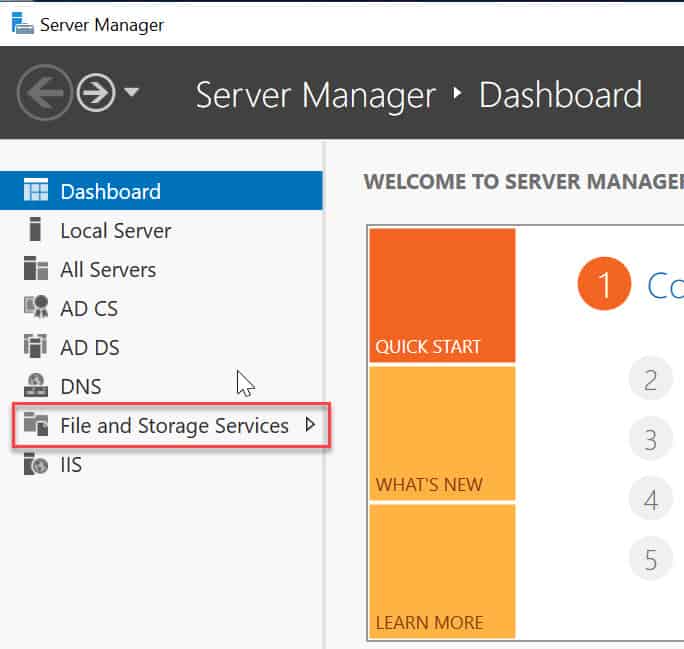
2. Launch Windows Server Manager. In the left pane click on File and Storage Services.

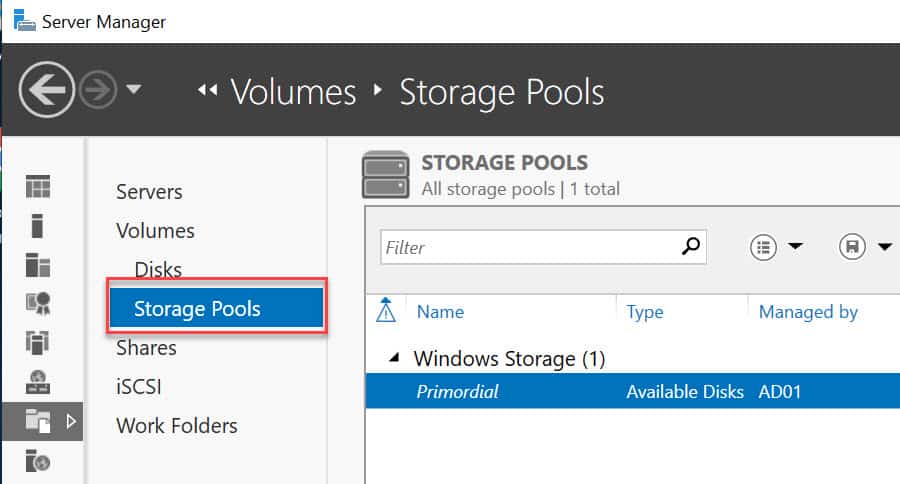
3. Click on Storage Pools. Right click on Primordial and select New Storage Pool.

4. Give the storage pool a name, such as Pool-1. You may need more than one pool, so use a naming convention that is logical and can scale.
5. Select all of the appropriate disks for this pool. In my case I have four disks that I want to use. Leave the Allocation to "Automatic".
6. Confirm the choices and wait for the pool to be created.
7. Now we need to create a new virtual disk to use the storage pool capacity that we just allocated.
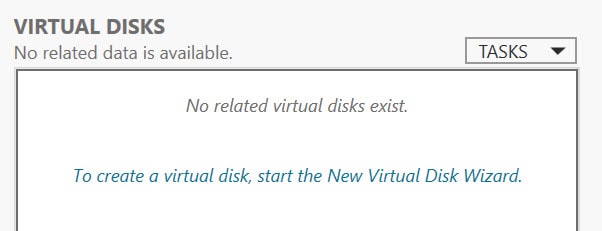
8. Click on To create a virtual disk, start the new virtual disk wizard.

9. Select the storage pool that you just created, in my case, Pool-1.
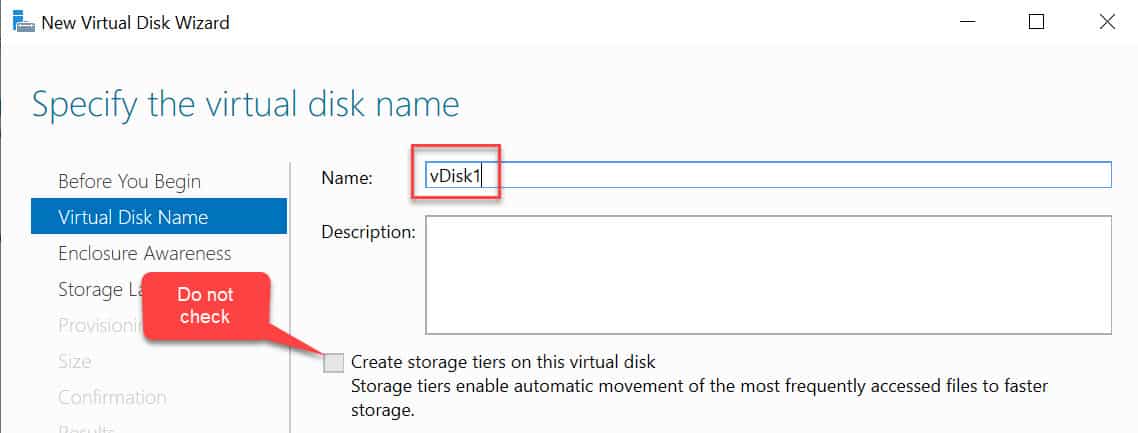
10. Give the virtual disk a name. Use a name logical for your environment. I'll be uncreative here and just use vDisk1. We do not want storage tiers, so don't check that box.

11. Next, we do NOT want enclosure awareness, so don't check that box.
12. Select Simple storage layout.

13. Use Fixed provisioning.
14. For the size of the virtual disk select Maximum size. Confirm and create the disk.
15. Next up we need to create a volume. That wizard should automatically appear.
16. Select the virtual disk (e.g. vDisk1) and click Next.
17. Review the size, which should be the maximum volume size.
18. Select the appropriate drive letter or mount point for this disk.
19. Select the appropriate file system, allocation unit size and volume label. Wait for the volume to be created. Note: Follow application specific best practices (e.g. NTFS cluster size) as you normally would. For example, for SQL database and log drives us a 64KB NTFS cluster size.
20. At this point you now have a 'normal' drive letter or mount point that your application can use.
Summary
When using Nutanix storage it can be beneficial to 'stripe' large amounts of data across a handful of smaller virtual disks. In Windows you can accomplish this with dynamic disks or Windows storage spaces. Dynamic disks can negatively impact I/O performance, so Nutanix recommends using Windows storage spaces. This is the 'next generation' disk management framework that Microsoft has for dealing with logical disks. For applications that can't natively shard data across multiple drives, using Storage spaces is a very valuable technique for maximizing performance on Nutanix.


One problem that we ran into was that Veeam does not have good support Windows Storage Spaces. You can backup the volume, but cannot do a file-level restore. You have to restore the entire VM in order to access any data. I’m not sure if other vendors support Storage Spaces.
Thanks for sharing:)
Could of years later but we’re just implementing this and, for disk performance and throughput, it’s great.
Mindful of the Veeam note from Neil Mann, we tested this and even in Veeam 11 the same issue persists for an image backup, where you can’t even see any volumes created on the storage space disks.
However, using Veeam Agent based backups works around this issue perfectly.