In a very high percentage of enterprise environments you need to securely delegate access to various applications and infrastructure components. Unless you work in a mom and pop IT shop, you should follow the security principle of 'least privilege' with RBAC (Role based access controls). This means a person with elevated access should only have the permissions to do their normal day-to-day job, and no more. Yes, that means don't dole out Domain Admins rights in AD, root level access on OSes, or give everyone "administrator" level access to your virtualization infrastructure.
Over the years as Nutanix has matured, we've been adding finer grained access controls to our management plane. Most of these RBAC features are surfaced in Prism Central (PC). Prism Central is an 'over-arching' management product that can control one or more Nutanix clusters, and has significant value add features vs. the basic management controls in Prism Element (the distributed management plane running on each Nutanix node).
In this blog post I'll be covering some new RBAC features that have been added to Prism Central (PC) 5.10. PC 5.10 is GA, so customers with active support and licensed for PC can upgrade to it. If you are running an earlier version of PC, you may not see everything I cover in this post. I'll cover a couple of scenarios in this post to give you a flavor of what's possible with PC 5.10 RBAC. First, I'll show how to delegate limited privileges to a single entity (e.g. a VM), then I'll show how you can use categories of VMs to delegate control to a group of VMs (e.g. all Linux VMs).
Single VM RBAC Example
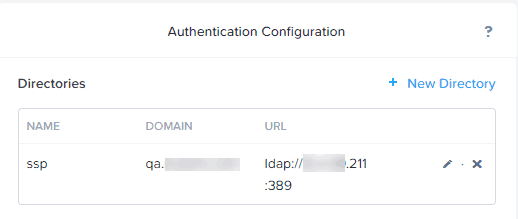
1. First in Prism Central we need to make sure LDAP authentication is enabled. PC RBAC uses LDAP users and groups to delegate access to various entities. Login to Prism Central, click on the gear icon in the upper right corner, then in the left pane click on Authentication. If not already configured, setup a LDAP(s) server. I strongly recommend secure LDAP (LDAPS) using port 636.
2. In Active Directory now create one or more groups and put the appropriate user(s) into the AD group.
3. Now we can start to define a custom role, with the permissions that we desire to delegate. To easily launch the Role editor, in the upper left corner of PC in the search box type roles.
4. Click on Create Role. Now, enter a role name. For this example I'll just call it "VM admin". Optionally, enter a description of the role so you can easily remember its purpose.
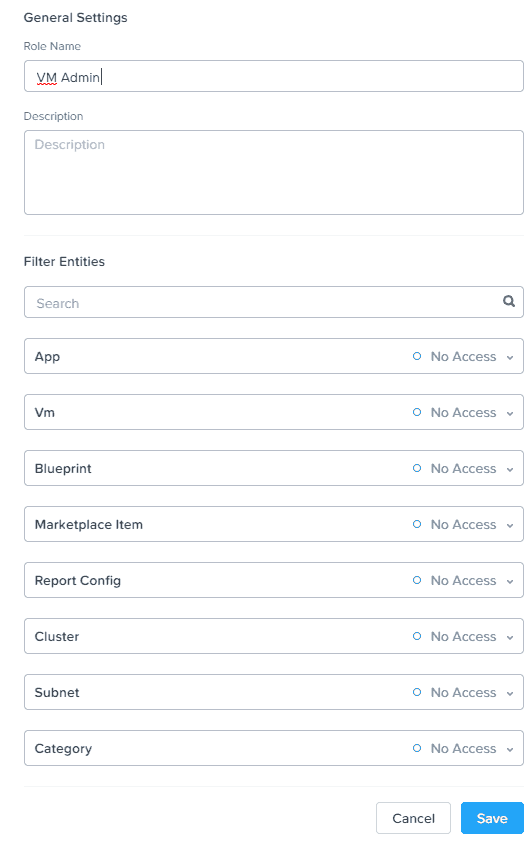
5. As you can see in the screenshot above, you can delegate permissions across a variety of areas with Prism Central, including VMs, Calm Blueprints, etc. In this example we will only be delegating VM permissions. Click on the VM box, and you will see the window below, where you can either use a pre-defined VM role, or create a very custom set of permissions. We will explore the custom settings.
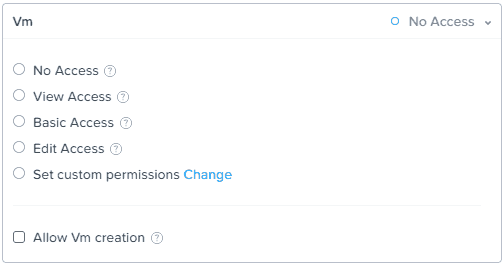
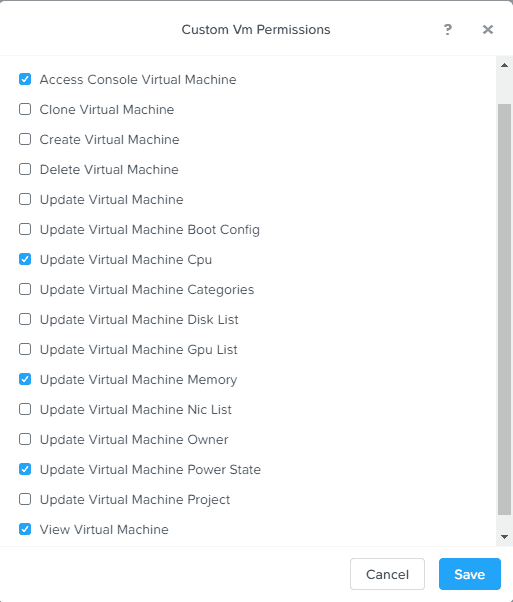
6. For our customized role, click on set custom permissions, then Change. Here, you have a variety of VM rights that you can select from. Pick the rights that you need for your environment, and make sure you also tick the View Virtual Machine box. Click Save. In this example I gave the role limited rights to modify CPU, memory and power state configuration.
7. Now that we have a custom role created, we now need to assign it to the VM that requires delegation. In the Role list check the box next to the role, then from the Actions drop-down select Manage Assignment.
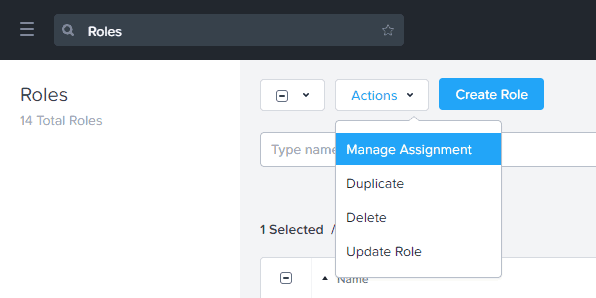
8. In the Role Assignment, enter the name of your AD user/group that you want to assign to the role, and then enter the VM name(s) that are the delegation target(s).

9. Log out of Prism Central, and then login as a user that is a member of the delegated group. You should now only see the VM(s) that you were delegated access to, and can only perform the authorized actions against those VMs. Viola...VM-level RBAC!
RBAC by VM Categories
In the previous example we delegated access to individual VM(s) by naming them in the Entities box. That's ok for one offs, or small environments. But what if you want to logically group VMs together (e.g. all production Linux VMs), and not worry about changing the role configuration every time? You can do that using VM Categories. Let's run through a quick example of how that works.
1. In Prism Central type Categories in the upper left search box, then click on Categories with the page symbol next to it.
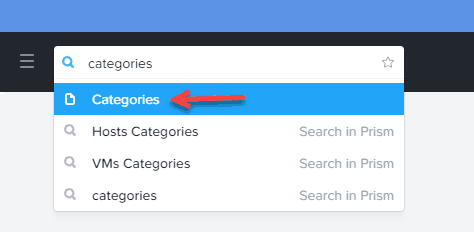
2. Click on New Category.
3. Enter the category name, purpose (description), and category values (sub-category). The 'value' is a sub-attribute of the category name. For example, if your category name was 'Department', this filterable value could be 'HR'. In this example I'm creating a category for Linux VMs, with a sub-value of CentOS.
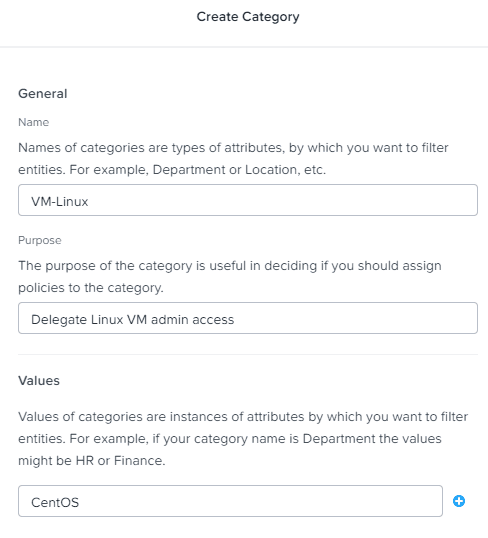
4. Once the category is created, go back to the list of VMs in Prism Central. Check the selection box next to all of the VMs you want to put in this category.
5. Click on the Actions menu and select Manage Categories. Enter the Category name in the box. Click Save.

6. Repeat step 8 in the prior section, but this time select Category instead of VM. Enter the name of your newly created category.

7. Log out of Prism Central, and now login as a user who is a member of the appropriate AD group. You should now ONLY see the subset of VMs that matches the category that you configured in the role assignment and only have the delegated permissions.
Summary
As you can see in these two examples, you can configure a variety of user permissions for controlling VMs via Roles. Roles can then be assigned to specific VMs, or assigned to a category of VMs. If you use the Category approach, then any VM you subsequently add to the category is automatically in-scope for the delegated RBAC permissions.


Hmm. Can’t seem to remove users once they are in a role. Manage assignment only allows you to added more users, not remove?
You can, but it’s not super obvious. Find your custom role, in the upper right click ‘manage assignment’ and from there you can change user/groups and the entities. It does appear you can’t directly add to an existing entity flow…will raise that as an issue.
Using categories as entities doesn’t appear to work. Still can’t delete users out of the role itself. Because of that, can’t delete role either. Will have to open a case. Quite buggy